


This article details how I provisioned a single Site-to-Site or Business-to-Business Virtual Private Network(VPN) service on Amazon Cloud services(AWS).
What is a Virtual Private Network(VPN)?
VPN stands for “virtual private network” — a service that protects your internet connection and privacy online. VPNs create an encrypted tunnel for your data, protect your online identity by hiding your IP address, and allow you to use public Wi-Fi hotspots safely. nordvpn.com/what-is-a-vpn
Why use VPN?
Well, because it's one of the best approaches to securing a connection. VPNs encrypt your internet traffic and route it through secure servers, making it more difficult for hackers or surveillance entities to intercept and decipher your data.
an example could be a remote worker in Lagos, Nigeria accessing a company's infrastructure in Paris, France or a business attempting to establish a secure connection to another business network and ultimately its infrastructure and services.
VPNs encrypt your internet traffic and route it through secure servers, making it more difficult for hackers or surveillance entities to intercept and decipher your data. This encryption helps protect your sensitive information, such as login credentials and financial transactions while using public Wi-Fi networks or browsing the internet.
Key Concepts for Site-to-Site VPN
VPN connection: A secure connection between your on-premises equipment and your VPCs.
VPN tunnel: An encrypted link where data can pass from the customer network to or from AWS. Each VPN connection includes two VPN tunnels which you can simultaneously use for high availability.
Customer gateway: An AWS resource that provides information to AWS about your customer gateway device.
Customer gateway device: A physical device or software application on your side of the Site-to-Site VPN connection.
Target gateway: A generic term for the VPN endpoint on the Amazon side of the Site-to-Site VPN connection.
Virtual private gateway: A virtual private gateway is the VPN endpoint on the Amazon side of your Site-to-Site VPN connection that can be attached to a single VPC.
Transit gateway: A transit hub that can be used to interconnect multiple VPCs and on-premises networks, and as a VPN endpoint for the Amazon side of the Site-to-Site VPN connection.
Architecture:
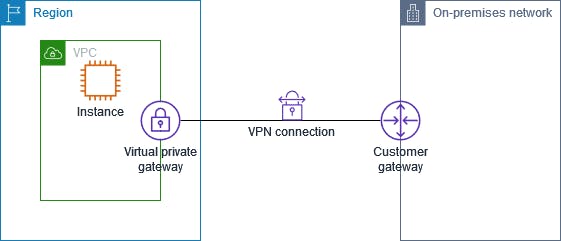
Procedures:
Step 1: Create a customer gateway
Step 2: Create a target gateway
Step 3: Configure routing
Step 4: Update your security group
Step 5: Create a VPN connection
Step 6: Download the configuration file
Step 7: Configure the customer gateway device
For demonstration purposes, This is a sample Site-to-Site VPN Form which we will be using to configure our VPN
Step 1: Create a customer gateway
From the image reference above, the customer gateway device appears to be an ISR series Cisco router with gateway 123.456.78.90. navigate to VPC > Customer gateways leave the rest as default and choose Create customer gateway. https://docs.aws.amazon.com/vpn/latest/s2svpn/SetUpVPNConnections.html

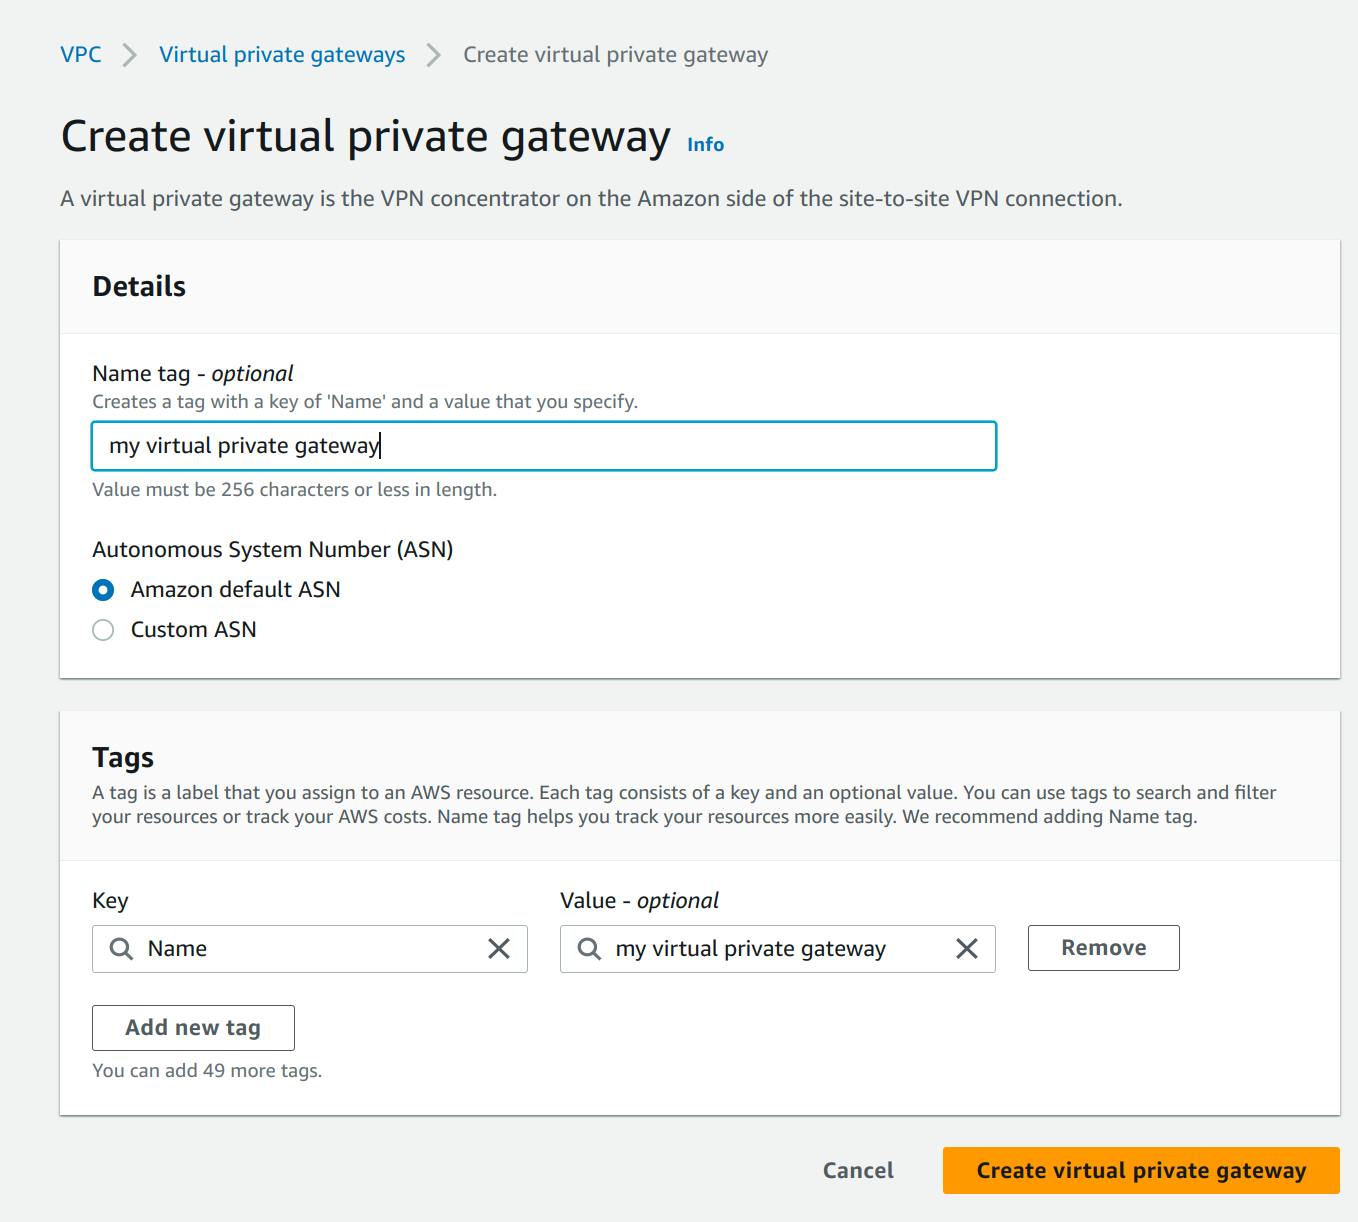
Step 2: Create a target gateway
To establish a VPN connection between your VPC and your on-premises network, you must create a target gateway on the AWS side of the connection. The target gateway can be a virtual private gateway or a transit gateway. for this article, I will be creating a virtual private gateway since I will only be connecting 1 VPC to the business-to-business(site-to-site) VPN. keep the default selection, Amazon default ASN, to use the default Amazon ASN. Otherwise, choose Custom ASN and enter a value. Select the virtual private gateway you created, then choose Actions, Attach it to the VPC.
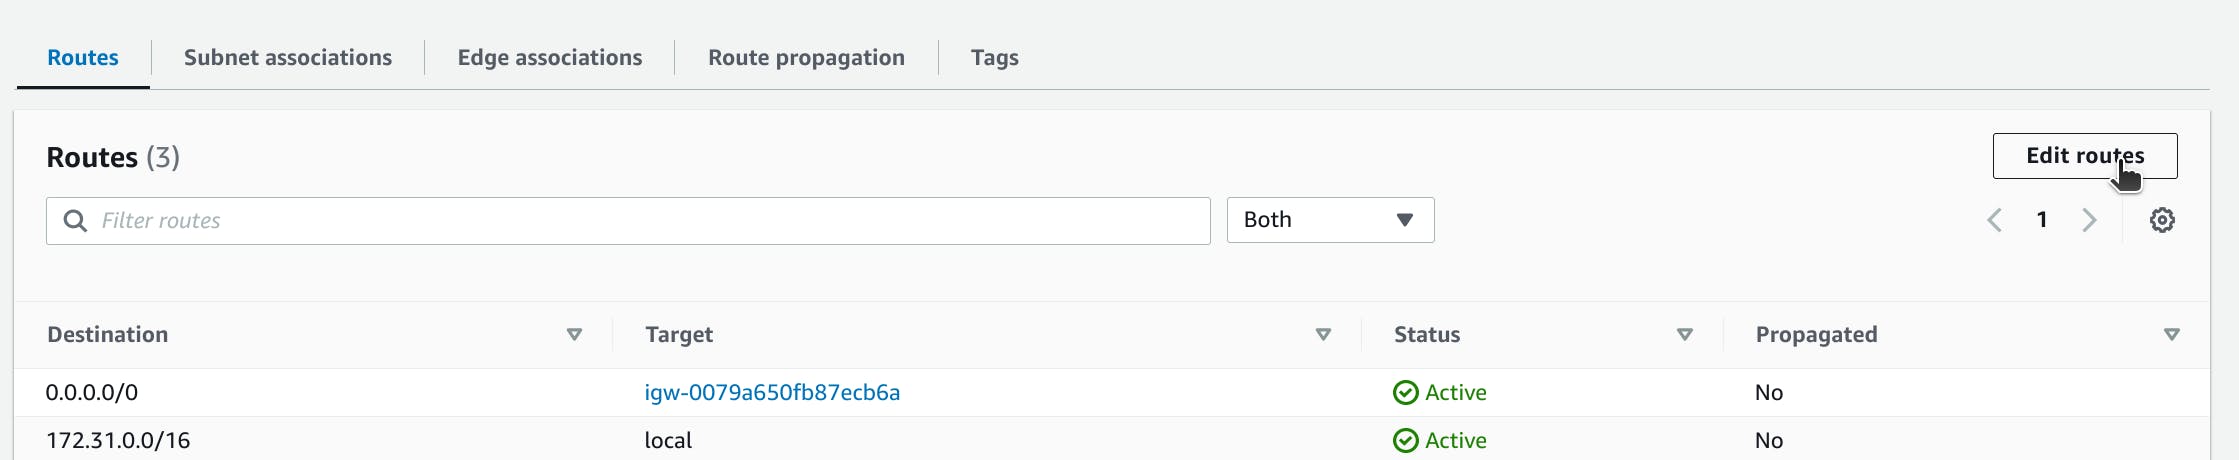
Step 3: Configure Routing
To enable instances in your VPC to reach your customer gateway, you must configure your route table to include the routes used by your VPN connection and point them to your virtual private gateway or transit gateway. in our case that will be the Private IP(Local IP) 101.123.444.55. include a wide CIDR range in our case /32 works just fine.


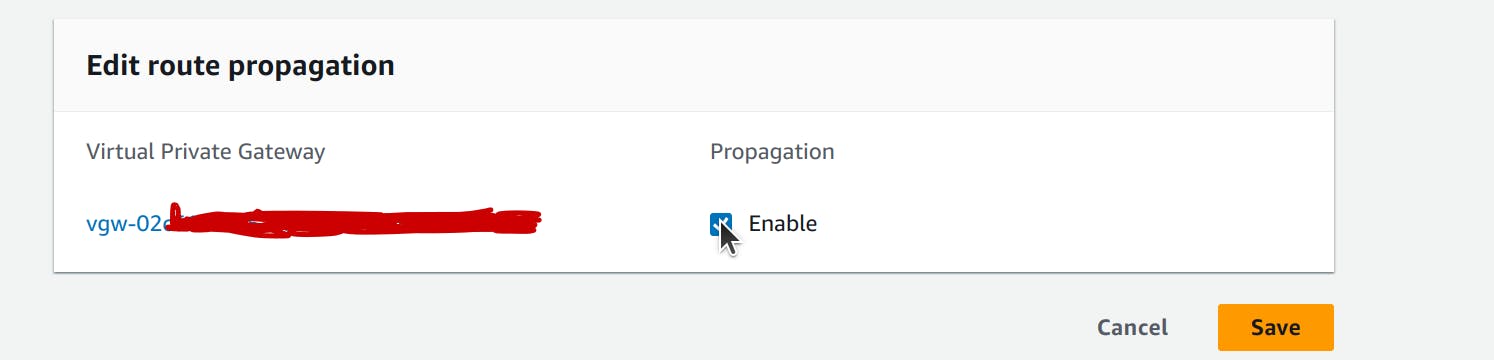
(Virtual private gateway) Enable route propagation in your route table
You can enable route propagation for your route table to automatically propagate Site-to-Site VPN routes.
For static routing, the static IP prefixes that you specify for your VPN configuration are propagated to the route table when the status of the VPN connection is UP. Similarly, for dynamic routing, the BGP-advertised routes from your customer gateway are propagated to the route table when the status of the VPN connection is UP.

Note:
If your connection is interrupted but the VPN connection remains UP, any propagated routes that are in your route table are not automatically removed. Keep this in mind if, for example, you want traffic to fail over to a static route. In that case, you might have to disable route propagation to remove the propagated routes.
To enable route propagation using the console
In the navigation pane, choose Route Tables.
Select the route table that's associated with the subnet.
On the Route propagation tab, choose Edit route propagation. Select the virtual private gateway that you created in the previous procedure, and then choose Save.
Step 4: Update your security group
To allow access to instances in your VPC from your network, you must update your security group rules to enable inbound SSH, RDP, and ICMP access.
To add rules to your security group to enable access
In the navigation pane, choose Security groups.
Select the default security group for the VPC.
On the Inbound rules tab, choose Edit inbound rules.
Add rules that allow inbound SSH, RDP, and ICMP access from your network, and then choose Save rules.
Note:
To follow the principle of least principle, you should only allow traffic on specific IP CIDR range if provided. in our case 101.123.444.55 CIDR range /32

Step 5: Create a VPN connection
Create the VPN connection using the customer gateway in combination with the virtual private gateway that you created in steps 1 and 2.
To create a VPN connection
In the navigation pane, choose Site-to-Site VPN connections.
Choose Create VPN connection.
(Optional) For Name tag, enter a name for your VPN connection. Doing so creates a tag with a key of
Nameand the value that you specify.For Target gateway type, choose either Virtual private gateway. Then, choose the virtual private gateway that you created earlier.
For Customer gateway, select Existing, then choose the customer gateway that you created earlier from Customer gateway ID.
Select one of the routing options based on whether your customer gateway device supports Border Gateway Protocol (BGP):
If your customer gateway device supports BGP, choose Dynamic (requires BGP).
If your customer gateway device does not support BGP, choose Static. For Static IP Prefixes, specify each IP prefix for the private network of your VPN connection. i.e 101.123.444.55/32
If you specified IPv4 for Tunnel inside IP version, you can optionally specify the IPv4 CIDR ranges for the customer gateway and AWS sides that are allowed to communicate over the VPN tunnels. The default is
0.0.0.0/0.For Outside IP address type, keep the default option, PublicIpv4.
(Optional) For Tunnel options, you can specify the following information for each tunnel:
A size /30 IPv4 CIDR block from the
169.254.0.0/16range for the inside tunnel IPv4 addresses but you can leave this because AWS generates it by default.To edit the advanced options for your tunnel, which we want, choose Edit tunnel options.
Specify the encryption algorithms, Diffie-Hellman group and lifetime for phases 1 and 2. Leave the rest as is.
Enable VPN logging and select an existing cloudwatch group or create a new one
Choose Create VPN connection. It might take a few minutes to create the VPN connection.
Step 6: Download the configuration file
After you create the VPN connection, you can download a sample configuration file to use for configuring the customer gateway device.
Permissions
To properly load the download configuration screen from the AWS Management Console, you must ensure that your IAM role or user has permission for the following Amazon EC2 APIs: GetVpnConnectionDeviceTypes and GetVpnConnectionDeviceSampleConfiguration.
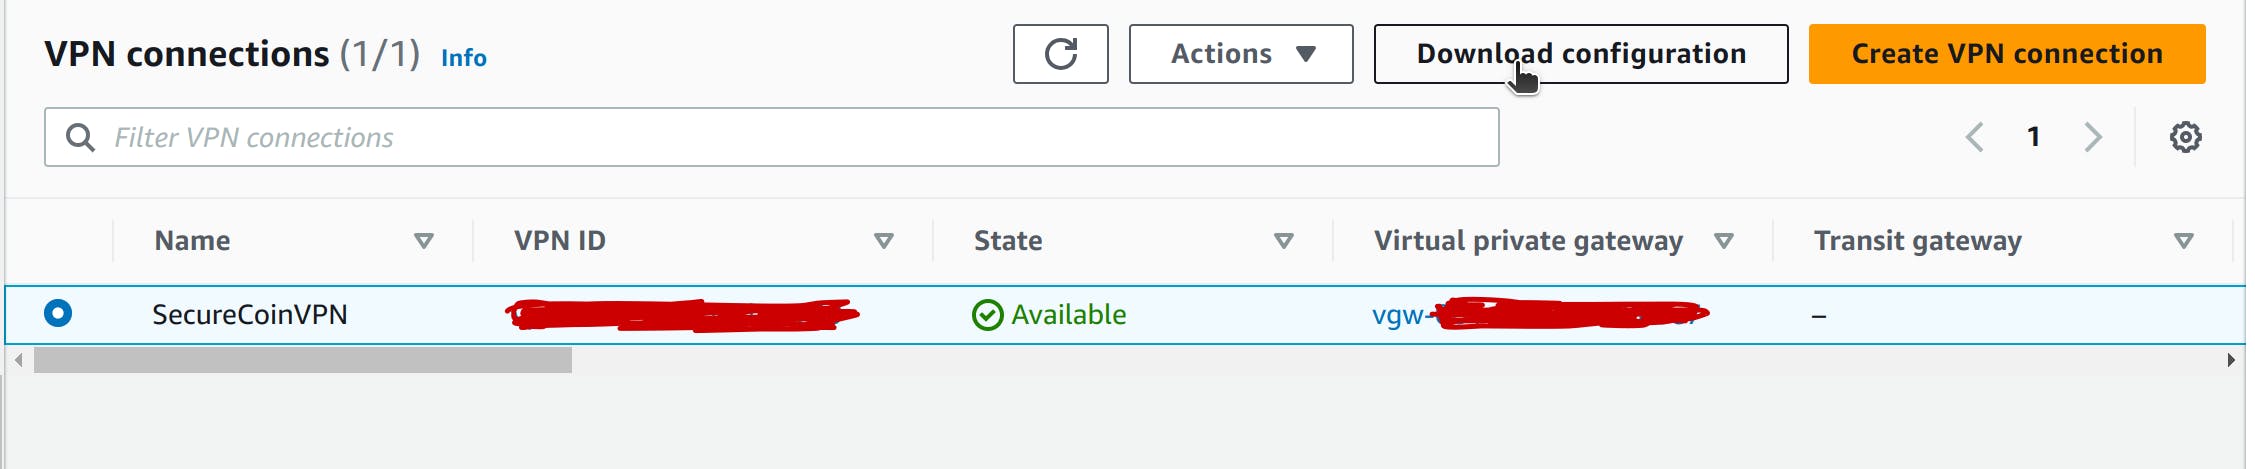

To download the configuration file using the console
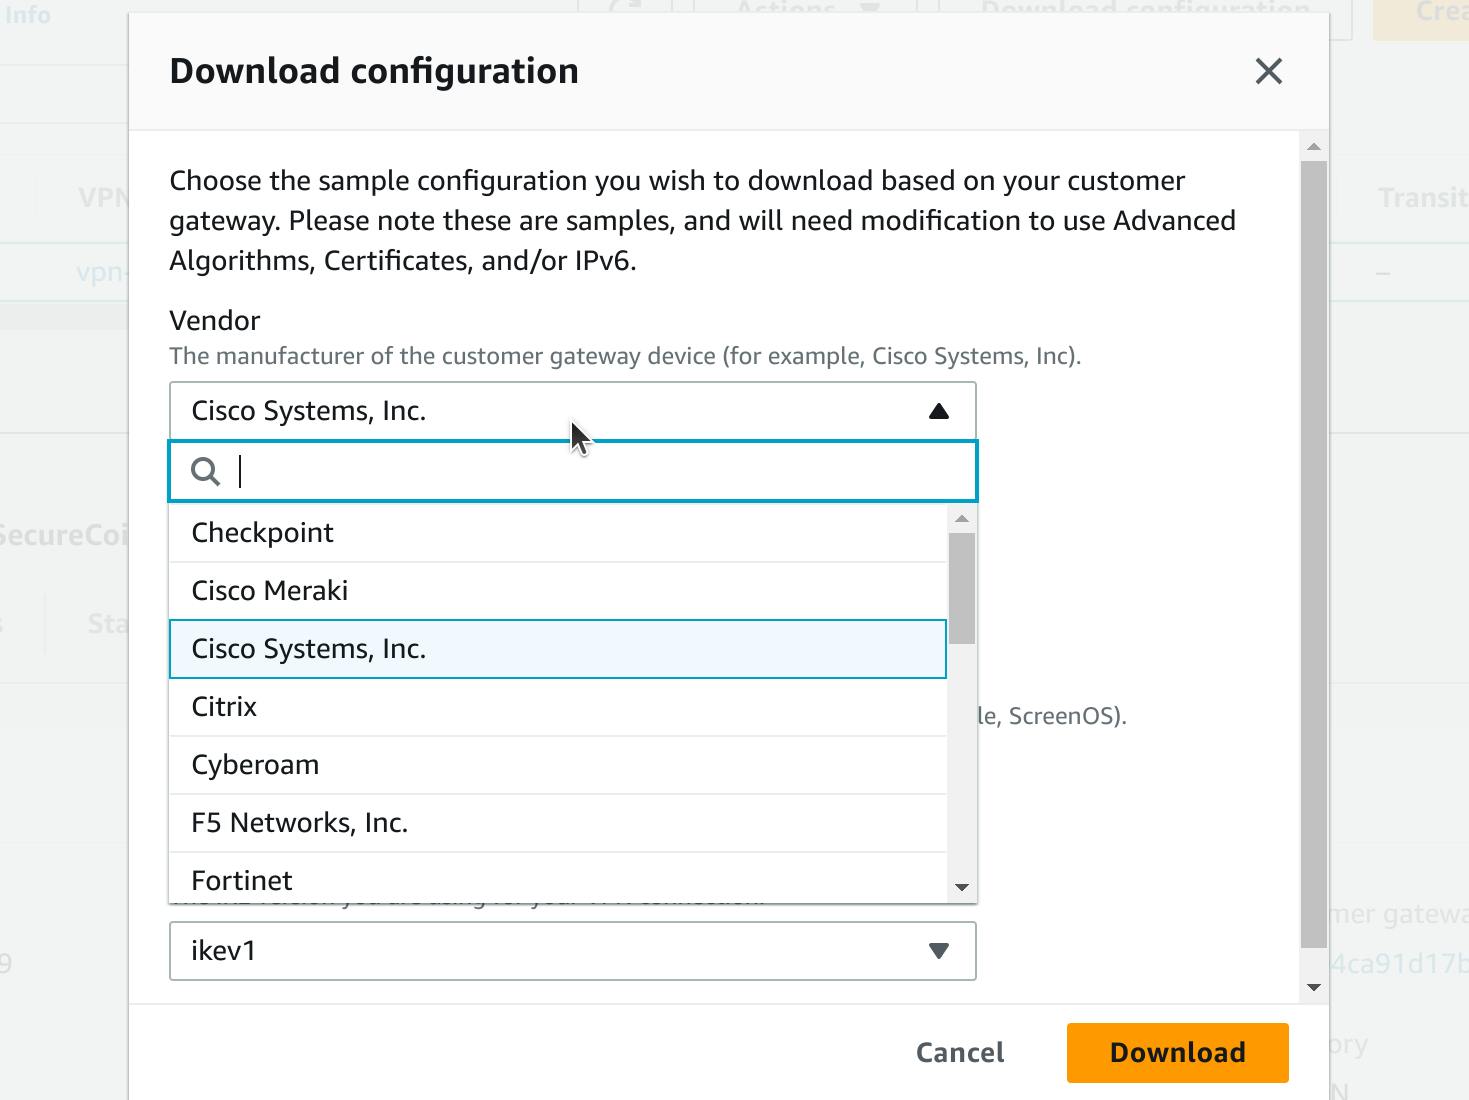
Select your VPN connection and choose Download Configuration.
Select the Vendor, Platform, Software, and IKE version that corresponds to your customer gateway device. If your device is not listed, choose Generic.
Choose Download.
Step 7: Configure the customer gateway device
Use the sample configuration file to configure your customer gateway device. The customer gateway device is the physical or software appliance on your side of the VPN connection. For more information, see Your customer gateway device.
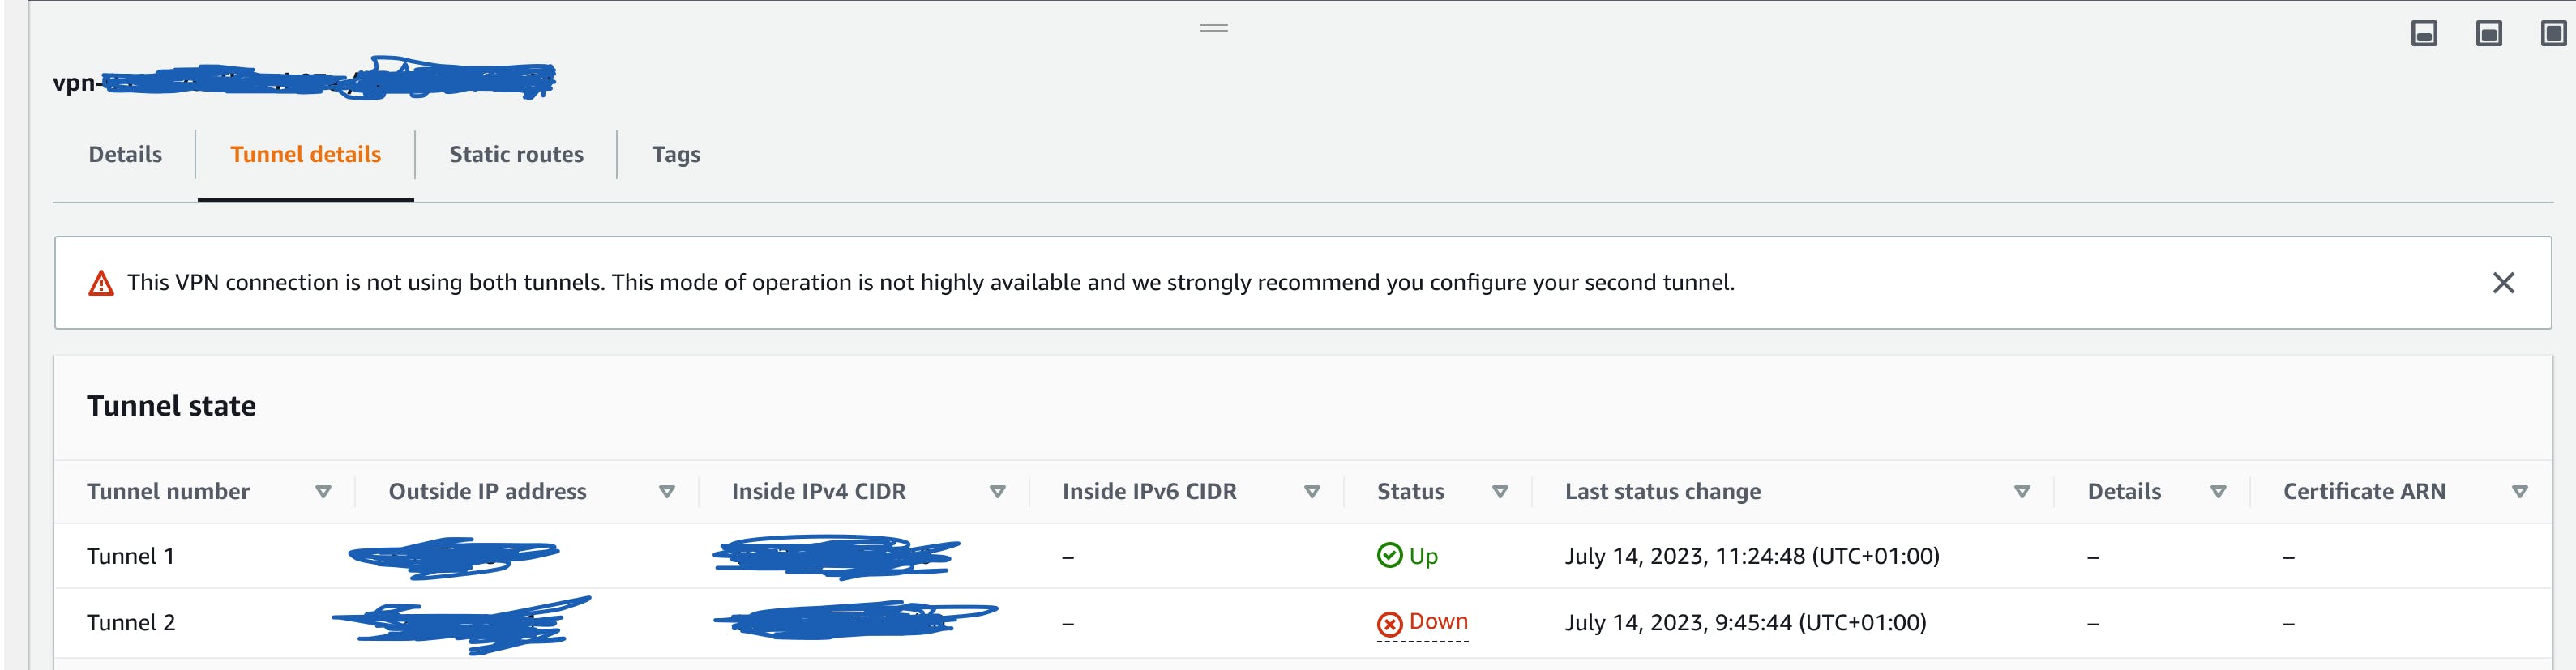
As soon as the customer gateway device is configured correctly, you should be able to see the "UP" status on the VPN.
ps: We intentionally neglected to consider the second tunnel when setting up the project. For high availability, this should not be the case.
Logs:

To read more about Site-to-Site VPN configuration: https://docs.aws.amazon.com/vpn/latest/s2svpn/SetUpVPNConnections.html